The steps required to connect an Android device to tigerWIFI differ slightly based on the type of device and the version of the Android operating system. The following screenshots were captured on Android 8.1 (Oreo), but generally apply to recent versions of Android on any device.
1. Tap the Settings icon  on your device. If you can't find the settings icon, consult your device's user manual for directions.
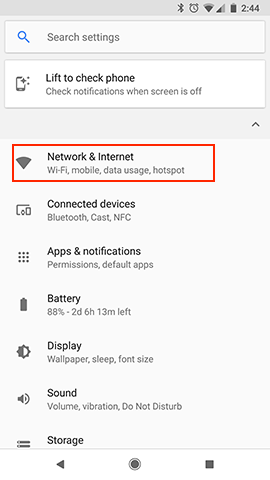
2. Tap Network & Internet and then tap Wi-Fi. If Network & Internet is not an available option, you may have an older version of Android. Instead, look for the option labeled Wi-Fi and tap it to continue.
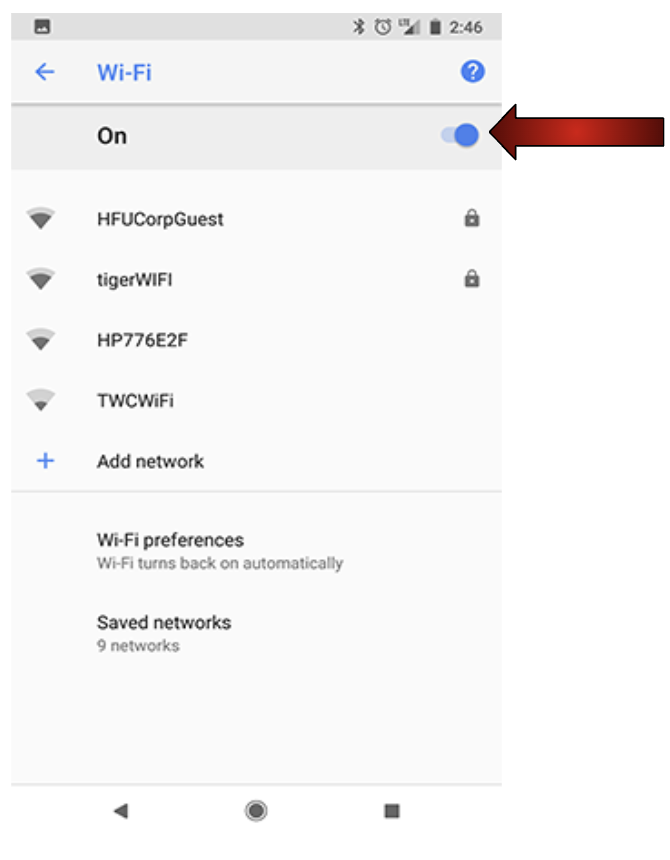
3. Ensure the switch button next to Wi-Fi is in the On position. Your device will automatically list tigerWIFI as an available Wifi network. Tap on tigerWIFI to begin setting up your connection.
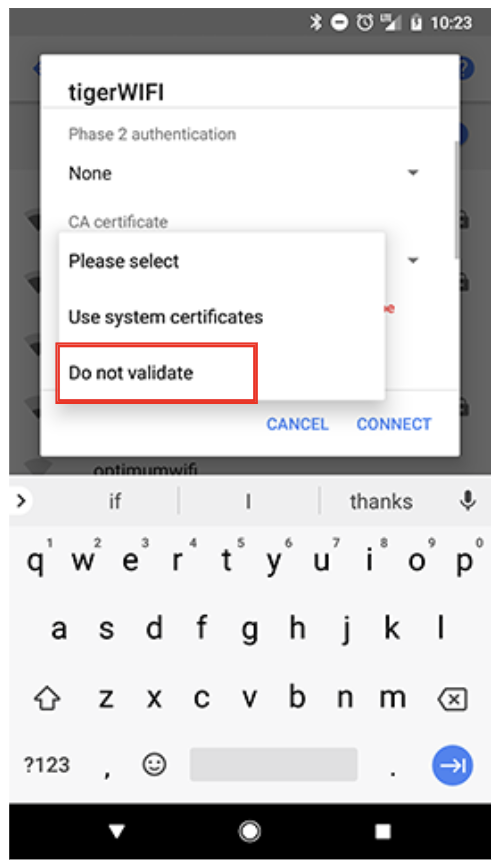
4. If prompted to choose a CA certificate, select Do not validate. If your version of Android already lists the CA certificate as Unspecified, you can skip this step.
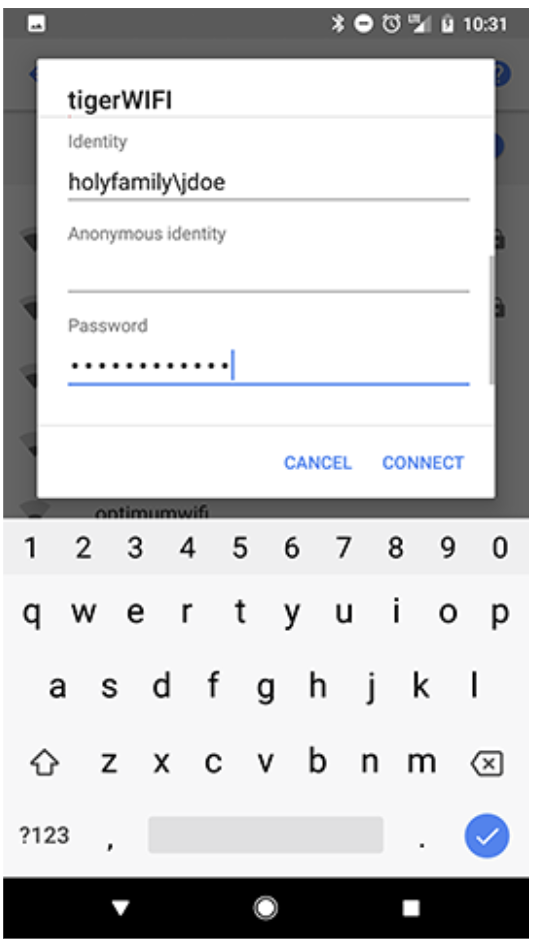
5. In the Identity field, enter holyfamily\ followed by your Holy Family username (without @holyfamily.edu). For example:holyfamily\jdoe. Note that the slash is a backslash (\), not a forward slash (/). Your version of Android, particularly older versions, may not require the holyfamily\ preceding your username. If your attempt to connect to tigerWiFi fails with holyfamily\ included, remove it and try again with just your username. Anonymous identity is not a field you are required to complete.
Your password is the same password you use to log into your Holy Family email account.
Tap Connect when you are finished.
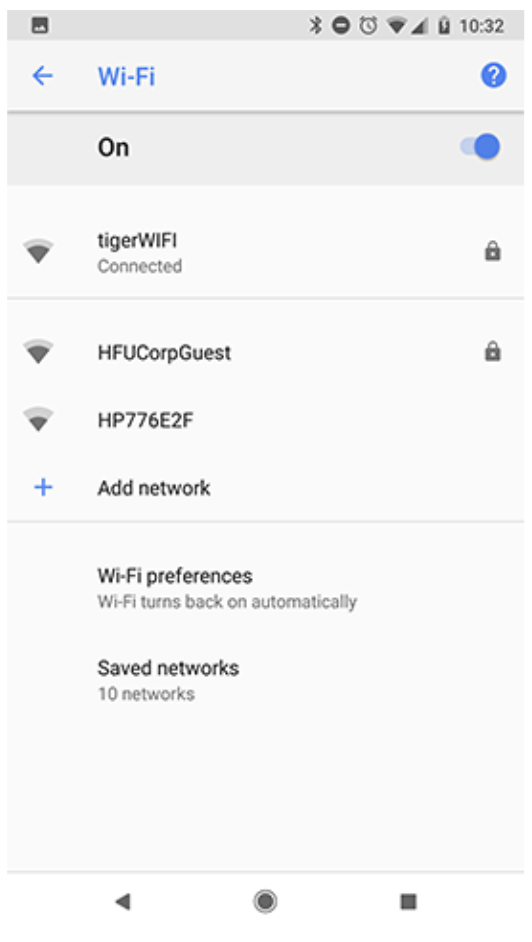
6. TigerWIFI will be labeled as Connected in your list of WiFi networks.